Raspberry Crumble Overnight Chia Oats (& A Giveaway!) by Lindsey | Dolly and Oatmeal


i'm not super into meal prep, and truth is i never really have been.  prepping meals for the week always seemed like the thing people were doing to make their lives easier. i see countless instagram accounts of people dedicating hours of their sunday to cook meals, conponents, and sides for the week.  and from my vantage point, that always seemed doable.  until i tried to do it.  but dedicating a few hours on a sunday when all i want to do is hang out with my family is a tough ask.  but truth is, for me, meal prepping tends to make me feel overwhelmed.  

the solution i've found for the moment is to prepare for at least 3 days with a dressing, a sauce, a make-ahead meal or two, and that's about it.  our schedule fluctuates so often during the week, between last minute meetings, appointments, work running late, etc., that i've found that an entire week worth of meals tends to get wasted, unfortunately.  

one of those meals i've been prepping to make mornings easier are these overnight oats.  most times it's just a basic version with rolled oats, chia seeds, almond milk, some smooshed fruit, and a good glug of nut butter on top.  sometimes i'll snack on it after a big workout, or give it to amesy for his morning or afternoon snack.  it's a reliable little dish to have on hand throughout the week that doesn't require more than what's in your pantry.  what i find helpful is to have a basic checklist, so that my pantry is always stocked with essential items i might need:

  • pantry-stable almond breeze almondmilk
  • rolled oats (certified gluten-free)
  • chia seeds/whole or ground flaxseed
  • nuts: almonds, cashews, pecans, etc.   
  • seeds: sesame seeds, sunflower seeds, pumpkin seeds, etc.
  • nut/seed butter: almond butter, cashew butter, tahini, sunflower butter, etc.
  • maple syrup or sweetener of choice

i usually buy most of these items in the bulk section of my grocer and store them in jars i've bought or collected over time.  i keep them front and center of the pantry so i know when to re-up the supply, it works for me, and keeps things running a bit more smoothly.  one thing that has definitely kept it all running though is always having almond milk on hand.  shelf-stable almond breeze almond milk is always there to come to my much needed relief when i'm in the middle of a recipe and run out of refrigerated almond milk  if there is one thing that i make sure my pantry is stocked with, it's that, and it lasts up to one year in there.  when you've got a hangry toddler demanding breakfast, it literally saves the day, and prevents things from becoming more chaotic than they need to be.  

xo, friends! 

GIVEAWAY: 1 lucky winner will receive a year's supply of almond breeze almond milk!  (open to US residents only, sorry international friends.) 

TO ENTER: leave a comment below sharing a time when your pantry-friendly almond milk came to your relief!  one winner will chosen at random, giveaway closes monday, july 2nd, at 5pm PST. *please leave a working email address.  good luck!! 

this post was created in partnership with blue diamond almond breeze.  all opinions and thoughts, as always, are my own.  thank you for supporting the sponsors that help keep dolly and oatmeal running!


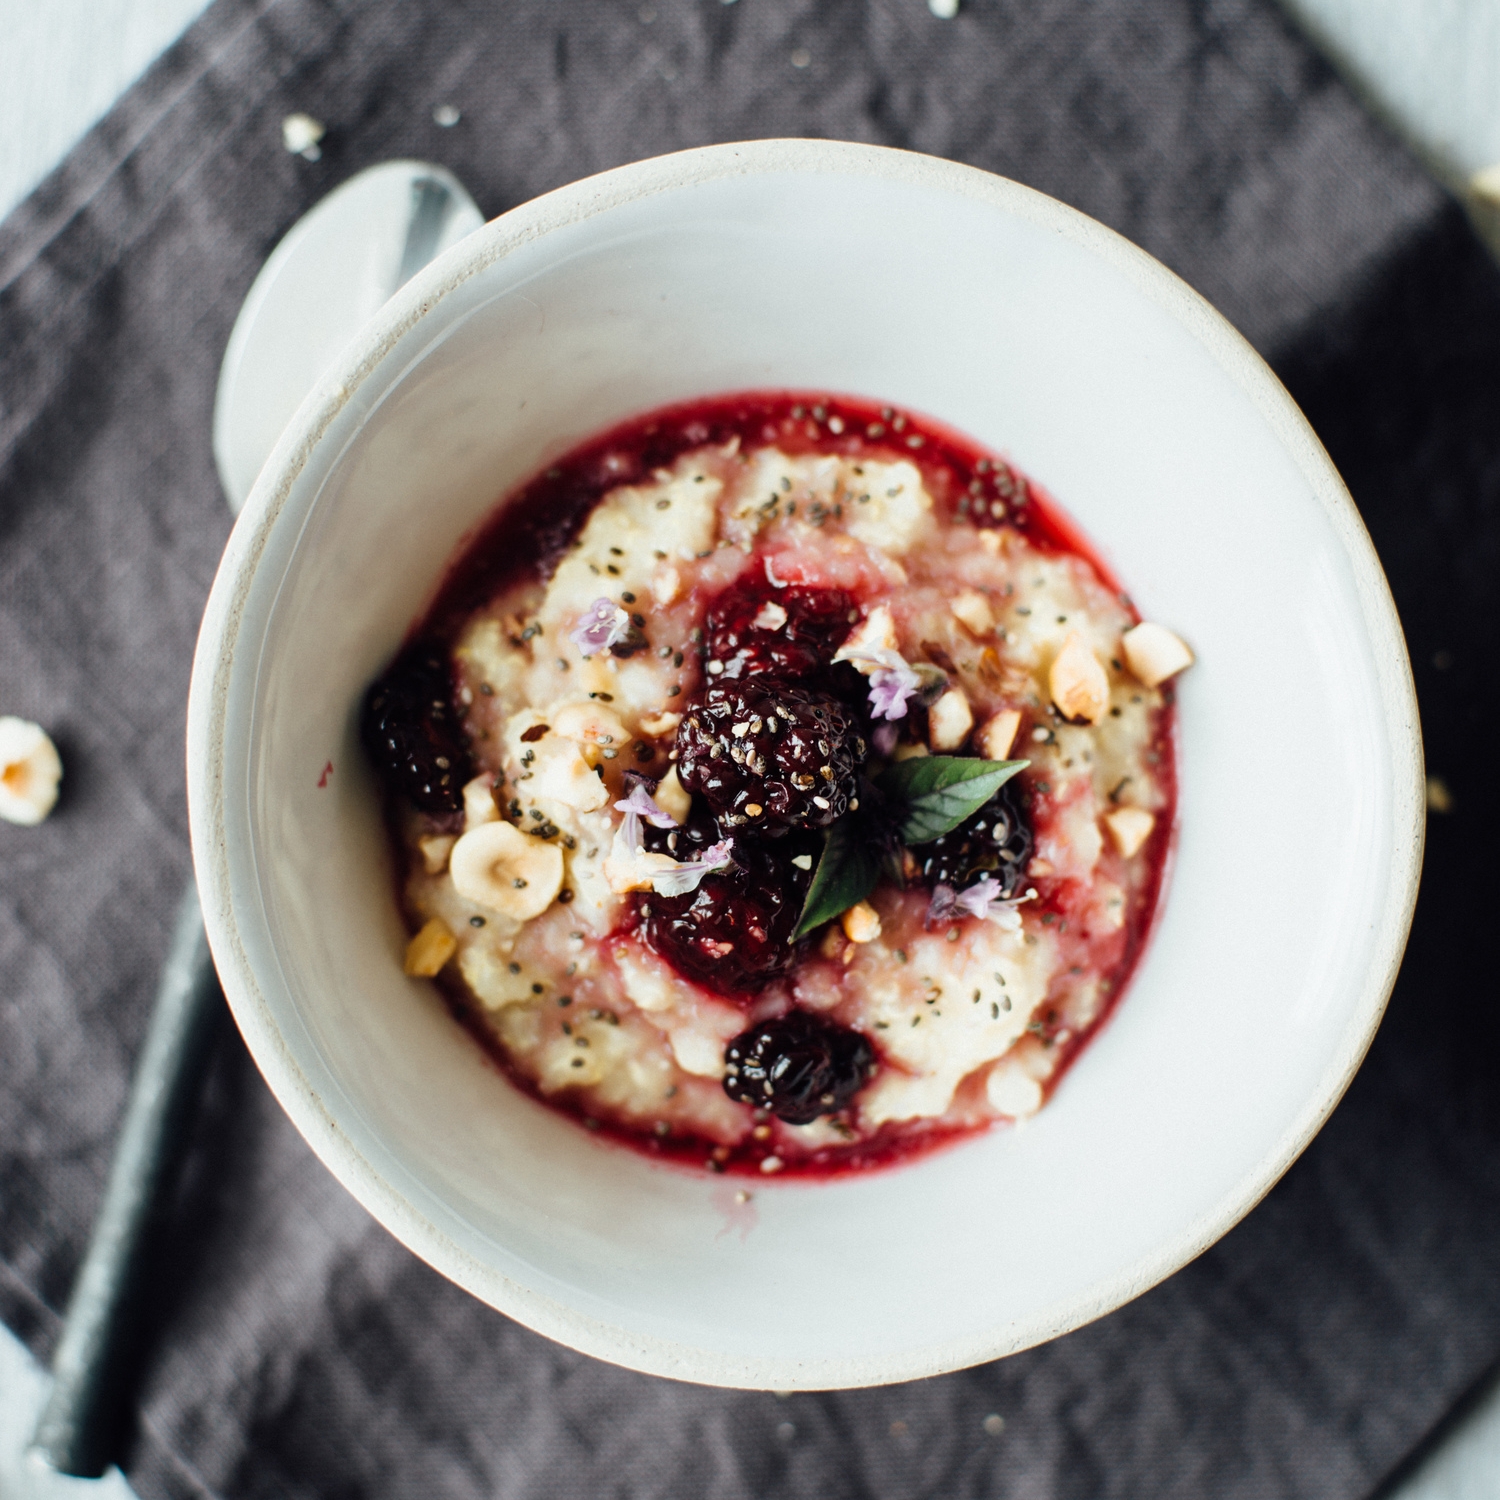
raspberry crumble overnight chia oats | gf & v

there are 2 options for making these overnight oats:

  1. with a baked crumble.  it adds an additional step, that only requires preheating the oven, and baking it for 5-7 minutes.  if you have the time, i think it's definitely worth the extra few minutes. 
  2. with a crumble.  this only requires a quick mixing of the ingredients, and then for them to sit overnight.  both are super tasty and still give you that crumble vibe.

print the recipe!

| makes 2 generous servings |

crumble

  • 1/4 cup almond meal
  • 2 tablespoons gluten free rolled oats
  • 2 tablespoons slivered almonds
  • 1 teaspoon black sesame seeds
  • 1/2 teaspoon chia seeds
  • pinch of salt
  • 1 1/2 tablespoon melted coconut oil
  • 1/2 tablespoon maple syrup

raspberries

  • 1 cup fresh raspberries
  • 1 tablespoon water
  • 1 teaspoon lemon juice
  • 1-2 teaspoons maple syrup

oats

  • 1 1/2 cups gluten-free rolled oats
  • 2 tablespoons chia seeds
  • fat pinch fine sea salt
  • 1 1/2 cups almond breeze almondmilk
  • 1 tablespoon maple syrup
  • 1 tablespoon almond butter


method

  1. crumblebaked: preheat oven to 350°F and line a baking sheet with parchment paper.  in a small bowl, mix together the almond meal, oats, almonds, sesame seeds, chia seeds, and salt.  add the coconut oil and maple syrup, use a fork to toss everything together.  place in the fridge for 10 minutes. 
  2. loosen the crumble with your fingers and turn out, and arrange it in an even layer on the baking sheet.  bake for 5-7 minutes, until golden brown. remove from the oven and let cool. 
  3. crumble: raw: mix together the almond meal, oats, almonds, sesame seeds, chia seeds, and salt.  add the coconut oil and maple syrup, use a fork to toss everything together.  cover the bowl, and store the crumble in the fridge overnight. 
  4. raspberries.  to a small saucepan over medium-low heat, add the raspberries, water, lemon juice, and 1 teaspoon of maple syrup. stir everything together and cook for 3-5 minutes, until most of the raspberries are broken down, and the liquid has reduced.  remove from heat and let cool.  store in an airtight container or jar and store in the fridge once fully cooled. 
  5. oats. mix together the oats, chia seeds, and a fat pinch of salt.  in a separate bowl, whisk together the milk, maple syrup, and almond butter.  stir the liquid ingredients into the dry.  taste and add more salt and/or maple syrup if desired.  place in an airtight jar or container, and store in the fridge overnight.
  6. to assemble: scoop desired amount of overnight oats into a bowl. (drizzle more almond milk if you want a thinner consistency.) add a good scoop of raspberries over top.  then add the baked or raw crumble over the raspberries (if using the raw crumble, use your hands to loosen the crumble into bits first).  add more almond butter if desired. 

similar recipes:


roasted strawberry yogurt 

roasted strawberry yogurt 

cacao chia breakfast pudding

cacao chia breakfast pudding

Chimichurri Avocado Toast by Lindsey | Dolly and Oatmeal


i'm popping in here real quick with this avocado toast "recipe".  it's not so much a recipe than it is a couple of favorite ingredients mixed together to make one epic piece of toast!  if you're not familiar with chimichurri sauce, it's a herb-based, green sauce that's traditionally used for grilled meats and fish. but it's also great in vegetarian dishes as well: used as a salad dressing, tossed into lentils or beans, or mixed into a pasta salad.  but, i love it on avocado toast!  and i think you will too!

it provides it a great garlicky flavor, and a bit of an acidic bite from the vinegar.  there's also a faint spice from crushed red pepper flakes.  and all together with creamy, smashed avocado just takes your traditional avocado toast up a significant notch.  sometimes i eat the toasts as is, with an egg on top, or served on the side.  it's a great "breakfast for dinner" recipe on a night where you need to take a break.  all in all, a super easy, but revitalized take on a classic 😉i hope you all enjoy it as much i do!

xo!!


chimichurri avocado toast | v & gf

print the recipe!

| makes roughly 1/2 cup chimichurri

  • 1/2 cup fresh parsley, chopped fine
  • 1/2 teaspoon dried oregano
  • 2 garlic cloves, grated
  • 1 tablespoon finely minced red onion
  • 2 tablespoons apple cider vinegar
  • 1/2 cup extra virgin olive oil
  • 1/2 teaspoon fine sea salt
  • 1/2 teaspoon red pepper flakes

toast

  • 3-4 slices gluten free bread, toasted (or preferred bread slices)
  • 1 ripe avocado
  • fine sea salt 
  • nasturtium or herb flowers for garnish (very optional)


method

  1. in a mixing bowl, mix together the parsley, oregano, garlic, red onion, vinegar, and olive oil.  stir in the salt and crushed red pepper flakes.  taste and adjust the salt and vinegar if desired.  store the chimichurri in a lidded jar in the fridge for up to 1 week. remove it from the fridge 30 minutes prior to serving.
  2. assemble the toast.  cut the avocado and mash it into the toast; season with salt, then top with the chimichurri sauce and nasturtium or herb flowers (if using) and eat right away.  

similar recipes:


cilantro hemp salad on tahini on tahini-yogurt toast

cilantro hemp salad on tahini on tahini-yogurt toast

miso-tahini avocado toast w/ black sesame gomasio

miso-tahini avocado toast w/ black sesame gomasio

tomato toast w/ macadamia ricotta

tomato toast w/ macadamia ricotta

Salty Smashed Potatoes w/ Harissa Yogurt by Lindsey | Dolly and Oatmeal


i think we can unequivocally say: potatoes are life.  especially this time of year.  around mid-june, back on the east coast, would be the beginning of new potato season.  my favorite farm stand, fishkill farms at our tiny brooklyn farmers market had the best little taters, second only to the csa potatoes my mom would get from stone barns farm.  every week we looked forward to roasting them plain with a bit of salt & pep, grilling them kebab-style with red onions, or making a potato salad.  but in all that time, i never tried a smashed version.  a couple weeks ago,  frank and i had a very casual memorial day celebration at our place, and i made smashed potatoes for the first time!  and now i'm kind of obsessed with them.  so much so, i have a few notes/technique tips for you to making these potatoes the very best.  

let's get started:

to start, choose your potatoes wisely.  I would advise to use fresh, market potatoes, simply because they taste the best.  you also want to keep them whole when you boil them, so the little to medium ones work best. 

next, i tried 3 different techniques in smashing them: using the bottom of a glass - this worked, but didn't make the potatoes craggy enough.  getting as many craggy surfaces allows for a lot of crunchy bits - which is key.  using the bottom of a baking sheet - while this is a great way to smash them if you're low on time, it still doesn't' produce a craggy enough surface (for me).  using a fork - i used a couple different forks, and what i found best was a large serving fork.  the potatoes are quite tender at the point when you're smashing them, so i found that a large fork, with a good amount of space between each prong worked the best.  and, drum roll, they produced the very best craggy, crunchy tops!  take away: use a serving fork!

another find. this might be controversial, but we're gonna roll with it.  i know there's all sorts of scientific studies/research that you should really use high heat oil when cooking above 350°F, and i usually do, but i really couldn't get down with the flavor of avocado oil on these babes.  so! i used extra virgin olive oil for that perfect flavor.

serve them immediately.  they're best when served straight out of the oven.   i wouldn't recommend this as a make-ahead dish.  you can reheat them, but they're kinda not the same (similar to reheating french fries, ya know?).  and that it on my notes! 

one more thing, i served these with a simple harissa yogurt sauce, which adds creamy, spicy, cool elements to the mix that just give you just about everything you need.  but could definitely eat them plain, with vegan sour cream, maybe some kite hill cream cheese, yogurt-tahini sauce, etc., etc.!

happy june, lovelies!! xo


salty smashed potatoes w/ harissa yogurt | v & gf

  • to note, the harissa paste i used had preserved lemon in it.  so, if you're using a homemade or store-bought harissa, with no lemon juice, i would suggest adding a squeeze into the sauce.
  • all other recipe notes can be found above! :)

PRINT THE RECIPE!

| serves 4 |

  • 1 1/2 pounds new potatoes
  • 3 tablespoons extra virgin olive oil, plus more for greasing
  • 2 tablespoons chopped parsley, plus more for garnish
  • flaky sea salt
  • fresh ground pepper

harissa yogurt (makes extra)

  • 5 ounces dairy-free (plain, unsweetened) greek-style yogurt (preferably this brand)
  • 2 tablespoons harissa paste (this is my favorite brand)
  • 1-2 teaspoons maple syrup 
  • 1 garlic clove, grated
  • fine sea salt
  • fresh ground pepper
  • chopped parsley and dill, for garnish (optional)


method

  1. place the potatoes in a large pot of salted water, and bring to a boil. turn the heat down to a simmer.  cook the potatoes until just tender (use a sharp knife to pierce a potato, if it sticks a bit but can easily slide off the knife they're ready), checking at the 10 minute mark, if they're not tender, continue to cook, checking after a couple of minutes under tender.
  2. while the potatoes are cooking, mix together the yogurt, harissa, 1 teaspoon maple syrup, garlic, and salt and pepper to taste.  taste and add more maple syrup if needed. cover, and place in the refrigerator until ready to serve.
  3. drain the potatoes, then let them dry a clean dish towel.  
  4. preheat the oven to 450°F.  line 2 baking sheets with parchments paper, and grease with a good drizzle of olive oil; use your hands to distribute it evenly.  place the potatoes on the oiled pans, about 1-2 inches apart. use a large fork (notes above)  to gently smash the potatoes down. 
  5. pour the remaining oil into a dish, use a pastry brush to brush the tops and sides.  sprinkle with chopped parsley, flaky sea salt, and a few cracks of pepper.
  6. bake in the oven for 15-20 minutes, until browned and crisp. remove from the oven and sprinkle with more parsley, and some dill sprigs.
  7. serve immediately with the harissa yogurt sauce.      

more potato recipes:


roasted fingerling w/ romesco & herby black quinoa

roasted fingerling w/ romesco & herby black quinoa

creamy horseradish potato salad w/ pickled shallots & dill

creamy horseradish potato salad w/ pickled shallots & dill

warm fingerling potatoes w/ garlic-turmeric sauce

warm fingerling potatoes w/ garlic-turmeric sauce